QikEasy IR Seeker now fully supports Word Block for Spike 2 & 3, Python for Spike 2 & 3, and Python for Pybricks on Spike Prime.

IR Seeker Hardware Setup
QikEasy IR Seeker allows for many different configurations. Here are some of the common ones.
1. Single IR Seeker for 180-degree coverage
Note: The main socket on the IR Seeker board is bidirectional. This means that it can be plugged-in on top of the Expander board in either of the two possible directions. This allows flexibility in your robot design to set the IR Receivers to face whatever direction as necessary.


2. Two IR Seekers (for 360-degree coverage) on one stack.


3. Two IR Seekers (with 2 IR Seekers connected by Extension cable)
This configuration allows one IR Seeker to be installed in the front of the robot, and another one at the back. Both IR Seeker should be installed such that their IR Receivers point outward.

Mounting your IR Seeker stack onto your LEGO robot
It is important to mount your IR Seeker stack securely onto your LEGO robot. We recommend using the long LEGO technic pins to connect the stack onto your LEGO parts. These pins also help tighten the connections between
the first IR Seeker and the Expander.
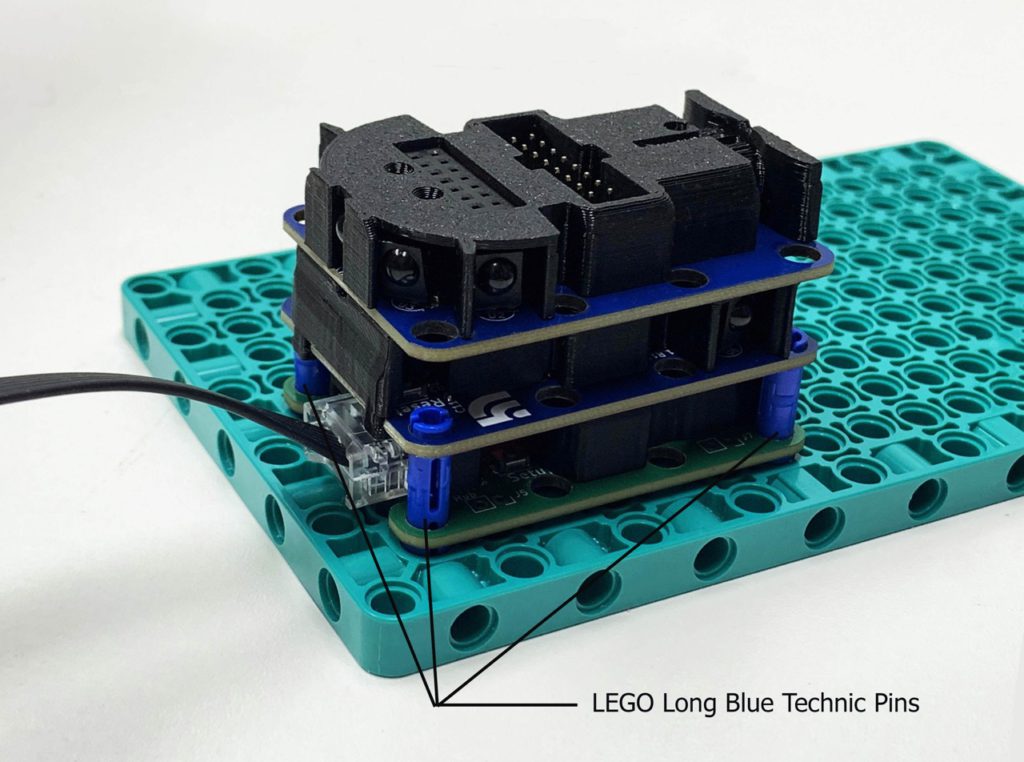
TIP: Make sure the IR Seeker’s underneath socket is completely pushed down into the female socket of the board below.