Introduction
The use of voice assistants like Amazon Echo or Google Home Assistant becoming more and more prevalent nowadays. It is useful to integrate your LEGO robot with such technology.

The use of voice assistants like Amazon Echo or Google Home Assistant becoming more and more prevalent nowadays. It is useful to integrate your LEGO robot with such technology.
The simplest way to create a custom voice command on your Amazon Echo to control a LEGO robot is through IFTTT. You should be able to use IFTTT to create a voice command for Google Home Assistant in a similar manner.
The Tutorial
This tutorial is based on the Remote Control Race Car we build in this tutorial. The key takeaway of this tutorial is about how to use IFTTT to setup a custom voice command to control your LEGO robot by using QikEasy Adapter, and not about building the LEGO robot itself.
1. Reserve a Fixed IP Address.
Reserve a fixed local IP address on the Wifi router for your QikEasy Virtual Wireless Sensor. This would allow your the IFTTT cloud to always know where to send HTTP request to.
You may google “Address Reservation for <your router model>” to find the exact details for performing this step.
2. Port Forward the External IP address to your Virtual Sensor.
The other requirement for IFTTT to be able to reach your QikEasy Virtual Sensor is that the adapter board must be accessible over the Internet. To do that, you will have to setup NAT Port Forwarding on your router. Essentially, when an external request (coming from the Internet) goes to your router’s external IP address with a port you specified in the Port Forwarding setting, the request would be redirected to the internal IP address you specified. You may google “NAT Port Forwarding for <your router model>” to find the exact details for performing this step.
3. Find your public IP address.
You can find that either on your router’s admin page, or simply google “my IP address”. This address will be the IP address that the IFTTT cloud will send requests to for updating data on your Virtual Wireless Sensor. The frequency in which your public IP address changes depend on your Internet Provider. If your Internet Provider doesn’t keep your IP address permanent, we suggest you to use a Free Dynamic DNS provider to map your changing IP address to a permanent hostname and domain name. An example of such provider is “noip.com”. Google “Free DDNS” to find out more about how to setup such service.
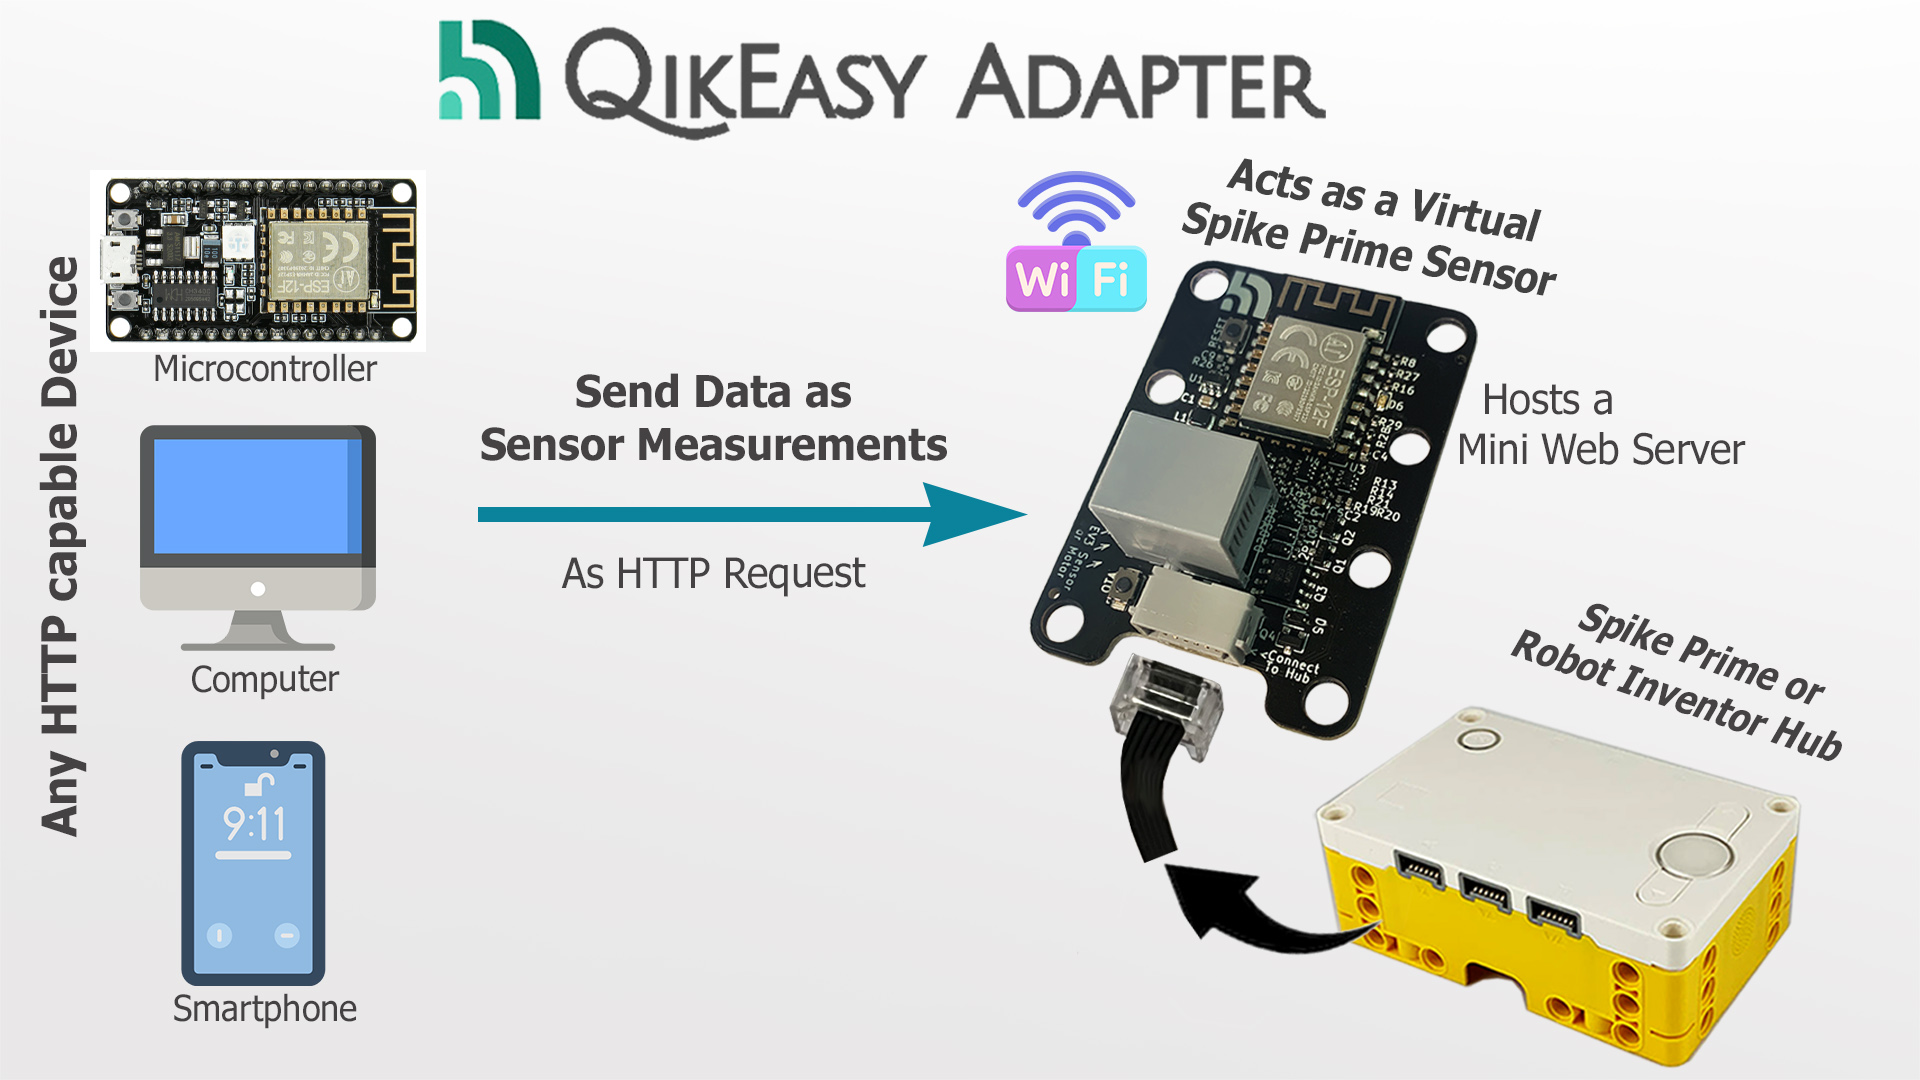
4. Make sure that your QikEasy Virtual Sensor is working.
Refer to this page for instructions on how to setup your Virtual Wireless Sensor.
In our race car project, this HTTP GET request URL would start the motor that moves the race car forward:
http://192.168.x.x/set?t=c&r=200&g=1024
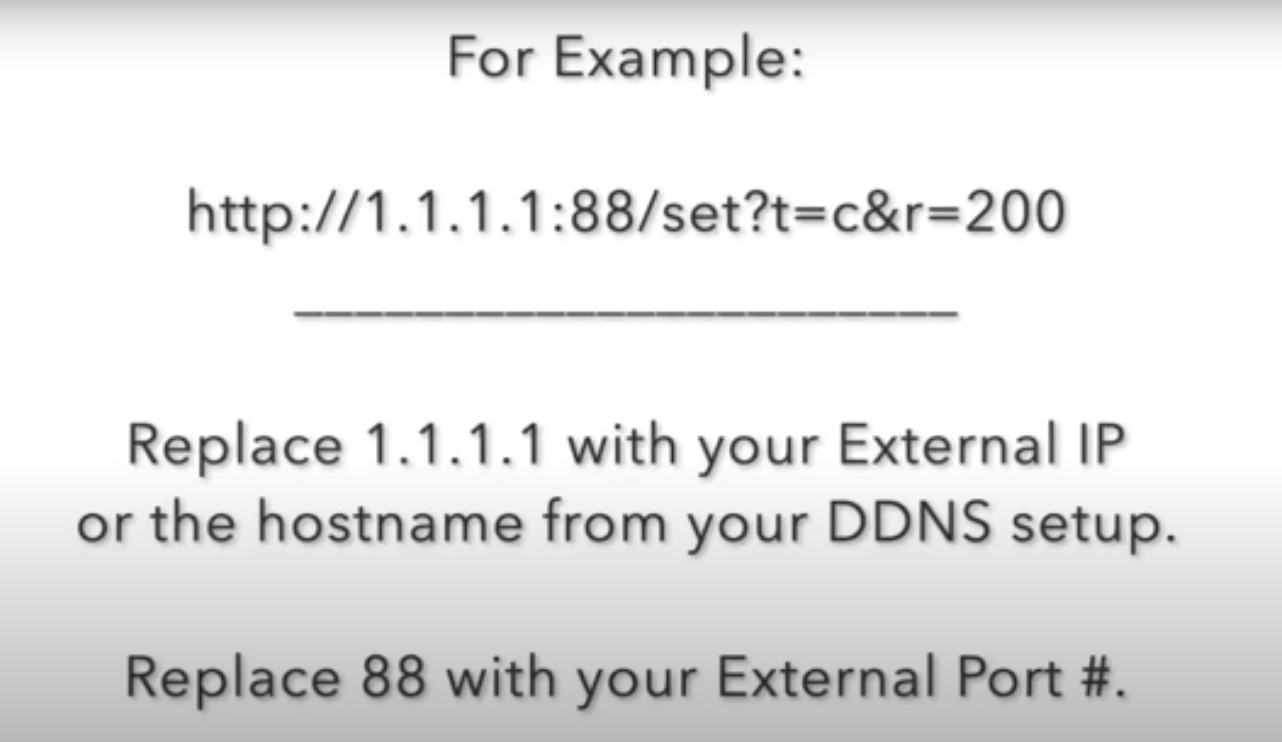
5. Construct your external QikEasy Virtual Sensor URL
Use your External IP address (or DDNS hostname) & the External Port Number in Step 2 to construct your external QikEasy Virtual Sensor URL.
6. Text your Virtual Wireless Sensor External URL.
Disconnect the local Wifi from your mobile phone. Test the URL constructed in the previous step on your mobile phone’s browser. Make sure your phone is connected to the Internet over the cellular network instead of through your local wifi router.
7. Setup IFTTT for the voice command: “Trigger Start Motor”
Follow these steps on ifttt.com:
See the YouTube video above for a step by step screencast tutorial on how to set up your voice command in IFTTT.
8. Testing your Voice command
Say “Alexa, Trigger Start Motor”, your Amazon Echo should respond and after a couple seconds, your race car’s rear drive motor should start moving.
QikEasy Virtual Wireless Sensor enables boundless opportunity for integrating your LEGO robot with other hardware and internet service.
With QikEasy Virtual Wireless Sensor, you can easily create custom voice commands on Amazon Alexa (or Google Home Assistant) platform to control your robot. What kind of voice command are you going to build? It is all up to your imagination.